My Photography Workflow & Storage Guide
I LOST TWO YEARS WORTH OF PHOTOS
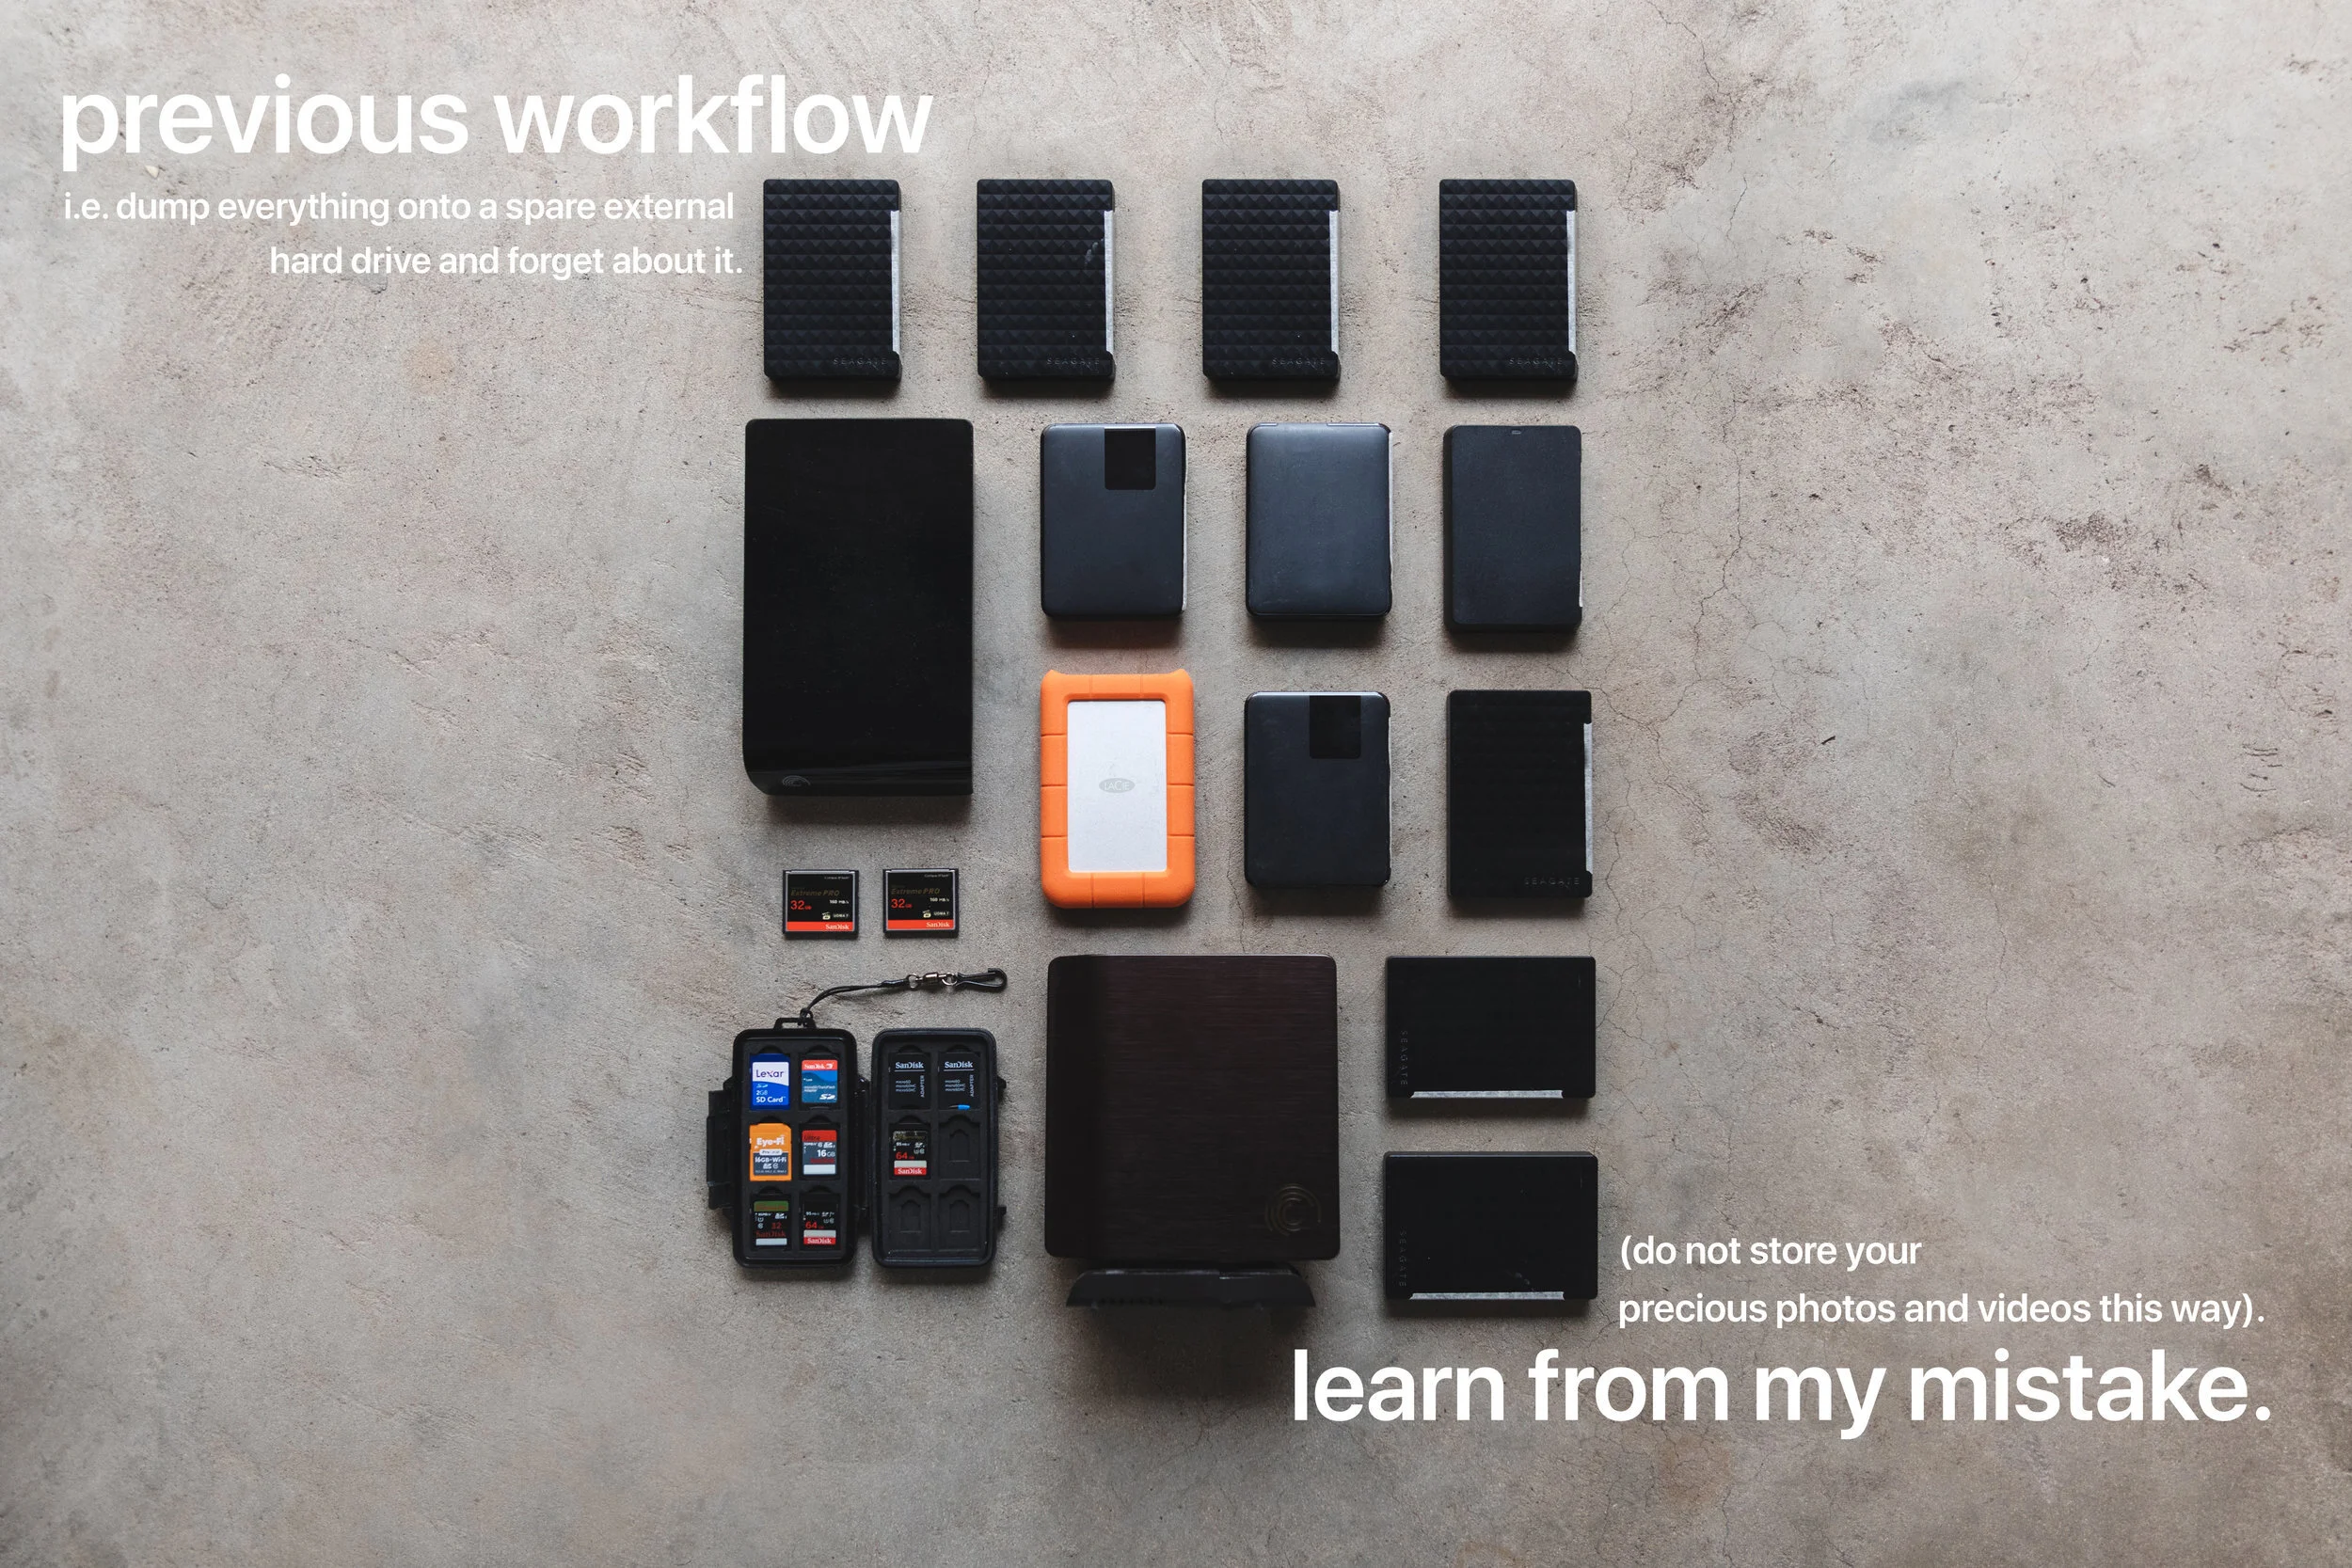
Yep - my entire 2014-2015 archive of photos and videos is gone. In a rush of night-before-my-flight packing, I mistakenly took the wrong hard drive for my Vegas & NYC trip. In hindsight, it was an easy mistake to make; I have a tall stack of external hard drives that literally all look the same (see photo below).
Midway through my trip, it came time to offload my SD cards when I realized that I had packed a hard drive that was full. I formatted it thinking I had a backup of those files somewhere at home (I didn't). It was weeks until I realized my mistake and by that time no amount of data recovery software could help me.
I knew I had to sort my situation out but I kept on putting it off - promising myself I'd find a better storage workflow after my current external hard drive filled up (I didn't). It's crazy how easily you can lose so many precious memories through a few simple mouse clicks.
I know there are a lot of you out there who can relate. I shared my mishap with you all on my Instagram stories and the response was huge (thanks for all the sympathy and advice). The horror stories you all sent in included: random hard drive failures, file corruption, misplacing memories cards, dropping hard drives, theft, lost airline baggage - to name a few.
Seeing how common this issue is, I thought I'd document my process in creating a fool proof workflow to share you with you all.
This blog post should give you an insight into my thought process on creating a easy to follow workflow and serve as a loose guide to help you to create your own solution.
MY OLD (BROKEN) WORKFLOW
My old workflow was bare-bones primitive (see below). It was literally a stack of portable external hard drives. I'd buy a new one when the old one filled up and that was it. If the files were important - say for a job, I'd duplicate it onto two hard drives. It is kind of hard to believe that I survived so long on this setup. It was cheap and seemed to work - until it didn't.
Collectively there is approximately 28TB worth of storage in this photo.
MY REQUIREMENTS
The problem with my old workflow was that it lacked a proper backup & organisation. It was extremely difficult to find anything and it didn't have any safeguards to protect my work from hard drive failure (or me accidentally deleting files). I needed a routine, redundancy and order.
My new solution needs to be:
Cost effective. Sure hard drives are cheap these days, but if you shoot all year long it starts to add up.
Large storage capacity. It is too much effort to be constantly buying and changing out hard drives throughout the year.
Data redundancy & protection. Hard drives fail - it's not a question of if but when. Also, I make mistakes and delete things apparently.
Straight forward to setup & use and be easy to maintain. Data storage and management isn't exactly fun. The less time I have to spend on it, the more time I have to shoot and edit.
Bonus: be accessible remotely. When I travel or I'm out of office, I often get licensing requests or such and need to access my files. Having access to all my files remotely (via Internet) would be a huge bonus.
After weeks of research and advice from my good friends at Synology & Seagate, all solutions seemed to point to a RAID NAS setup. Synology & Seagate were kind enough to point me in the right direction and send out some of their awesome products to implement into my new workflow.
THE SOLUTION:
RAID / NAS SETUP IS THE KEY
Like I mentioned above, all hard drives are susceptible to failure. They are essentially a box of moving parts and spinning disks so something is bound to wear out or malfunction given enough time and use. That's where RAID configurations come in.
A RAID setup will protect you from hard drive failure.
Through the use of some clever software, a RAID configuration combines multiple hard drives to safeguard you in the event of hard drive failure. If say, one of your four RAID configured hard drives fail, the other 3 functioning hard drives are able to rebuild and recover the files from your broken hard drive.
It does this at a small cost: you'll lose some of your total hard drive capacity and performance speed. It is definitely worth it if it means your data has an extra layer of protection.
A NAS station allows you connect your hard drive system to a network (so it is accessible via your home WIFI and/or via the Internet).
*There are different types and levels of RAID configurations. Read more about RAID and NAS setups.
WHAT YOU'LL NEED
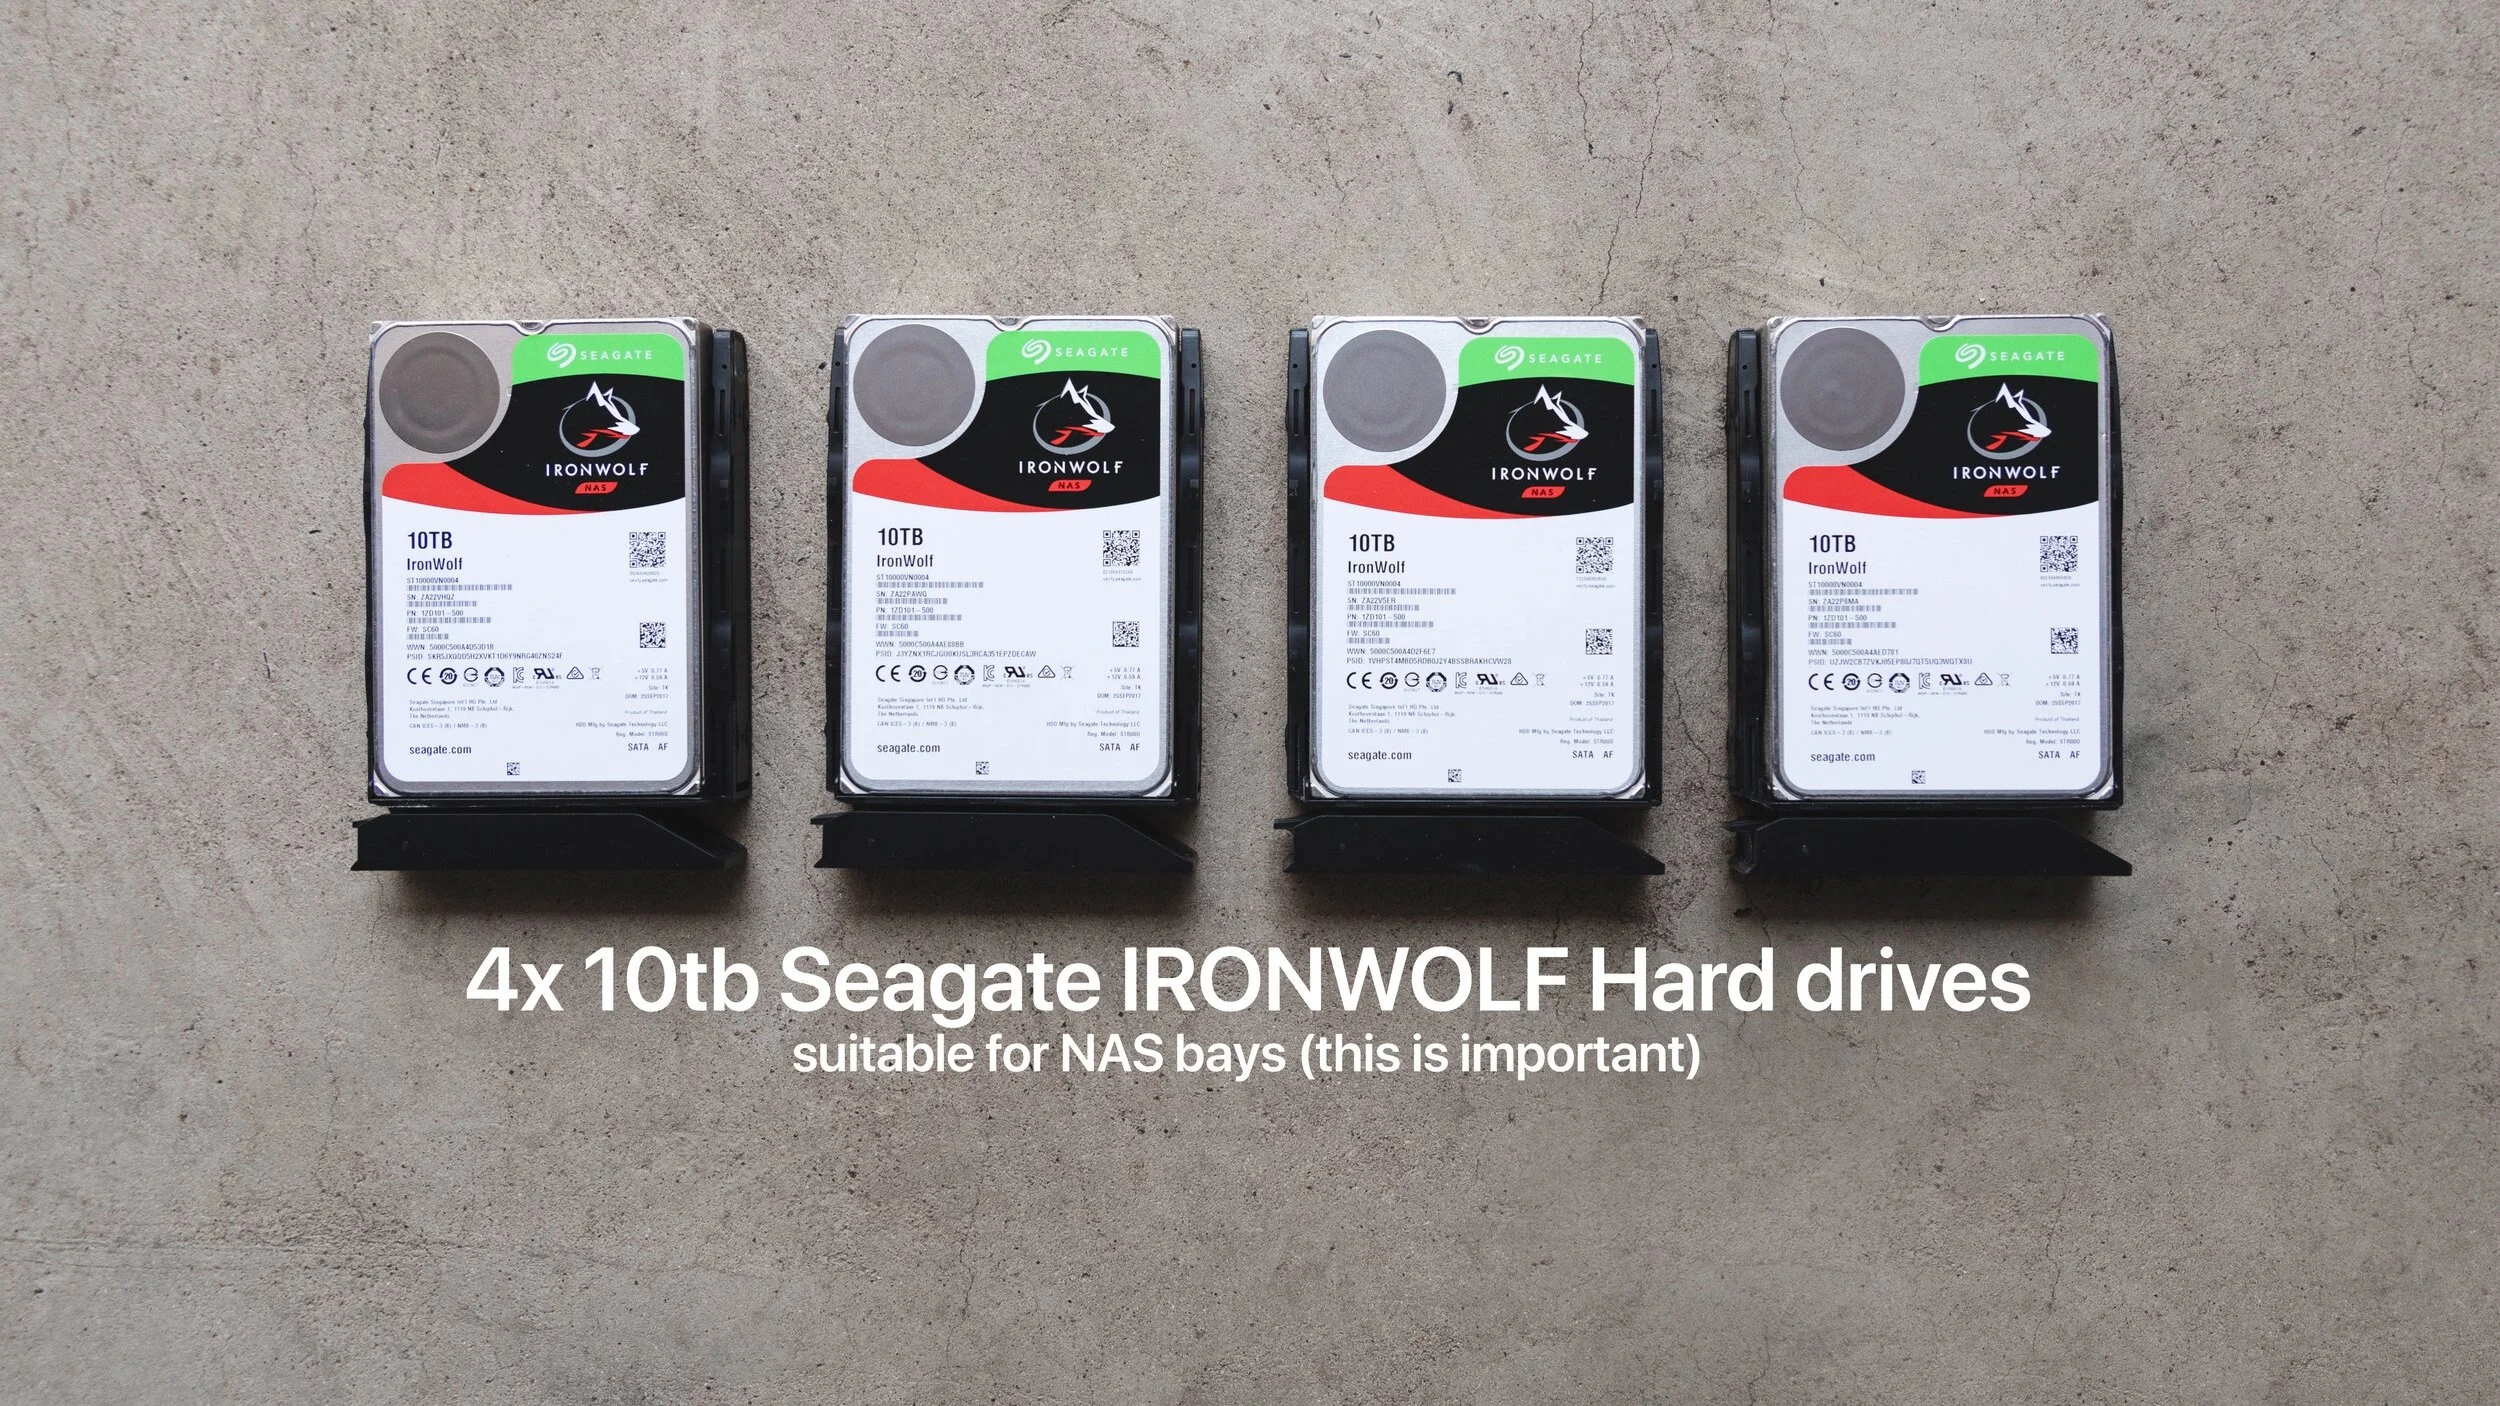
4X 10TB SEAGATE IRONWOLF HARD DRIVES
First you'll need to pick the hard drives you'll be storing your files on. They may all seem the same at first, but they are not.
I went with these awesome 10TB drives from Seagate: IronWolf 10TB 3.5" hard drives. I've used Seagate drives for years and they haven't failed me yet. Seagate's IronWolf range are NAS-optimised, are compatible in a multi-bay setup (this is important) and are fast enough for my needs.
I went with the 10TB version to give me a combined storage capacity of 40TB. Hopefully this should last me a whole year.
Please note: if you're planning on getting a NAS that houses multiple hard drives in one enclosure, you'll need to buy multi-bay compatible hard drives. The Seagate IronWolf series have in-built vibration sensors to help protect them in a multi-bay setup. Click here for full specs & details.
SYNOLOGY DISK STATION (DS918+)
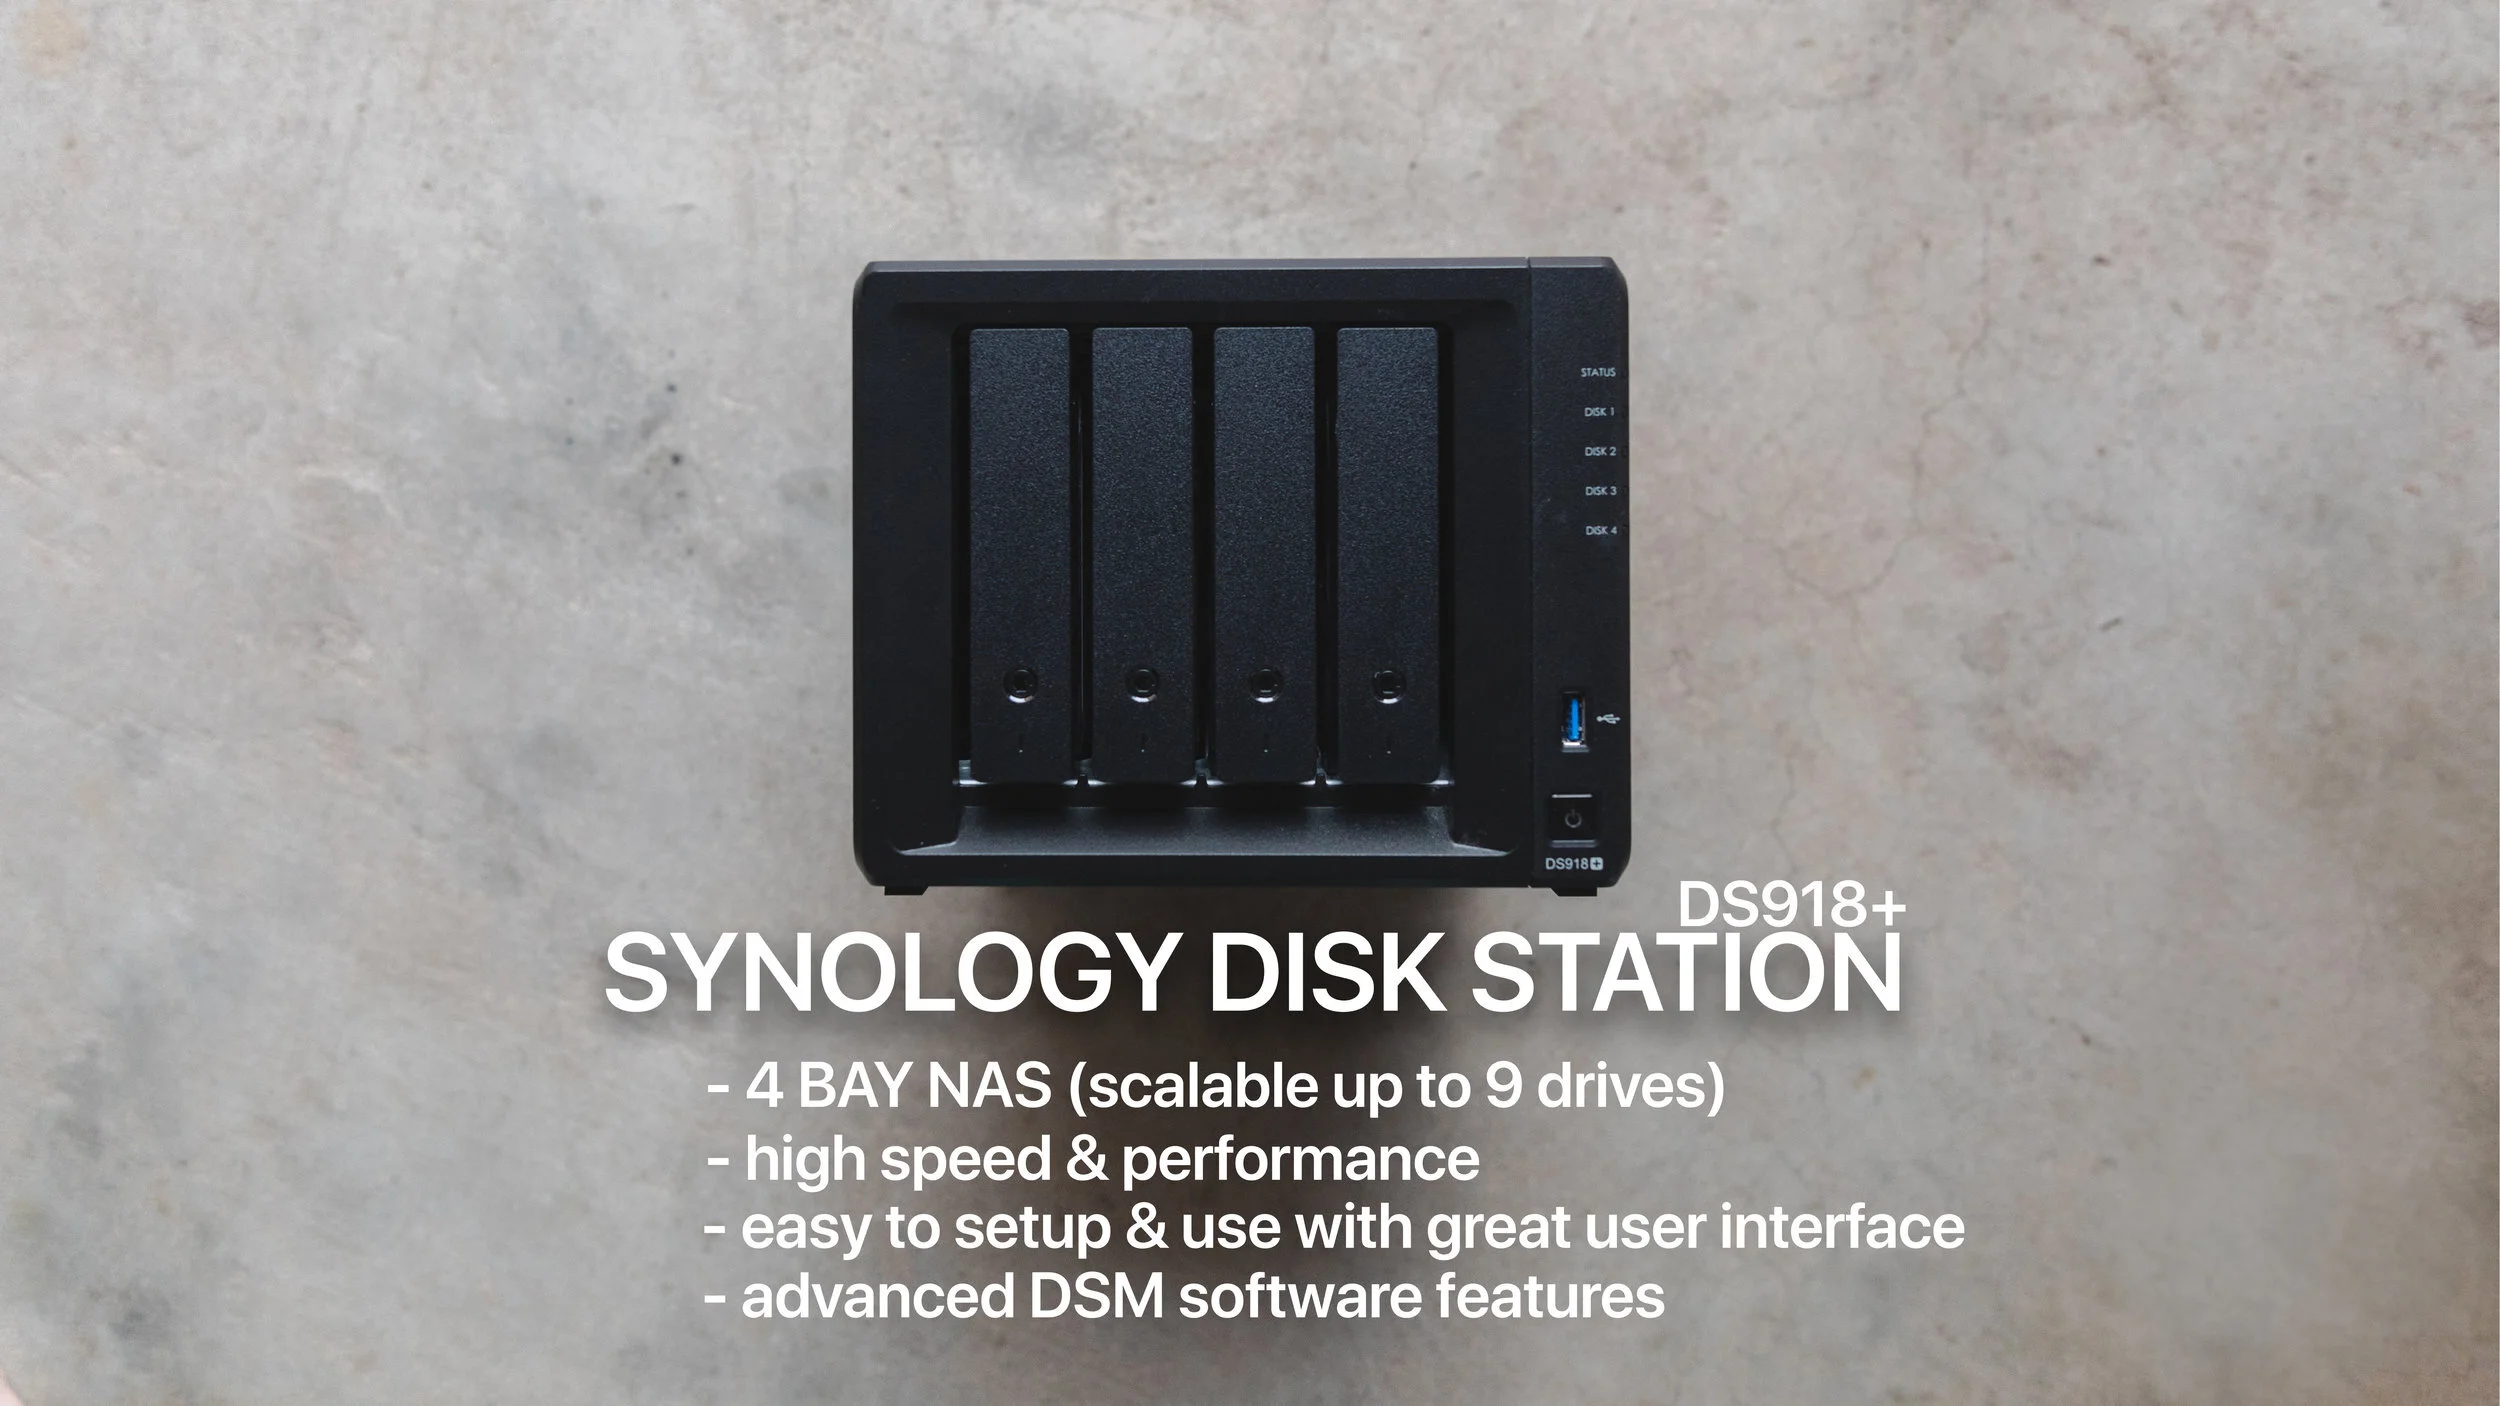
There are a lot of options and variations when it comes to NAS stations and enclosures. I chose Synology DS918+ Disk Station because of Synology's award winning reputation and all the software and management features it has. It is also quite affordable compared to the other options on the market.
WHAT I LIKE ABOUT IT:
Easy to setup and maintain. Network storage can be unnecessarily complicated and confusing so this was super important to me. It has a setup wizard which basically hand-holds you through the entire process which was super helpful. I had no problems connecting it to my network & Internet either. It was literally as simple as plugging a cable straight into my modem and computer.
After setting it up, I am able to access my hard drives straight from my Finder (Mac) & Explorer (PC) folders. All my files are also easily accessible from the Internet via a my own custom web address.
Build quality & sleek design. It is well made, looks great and the sleek black design fits right into my studio. Installing hard drives into the slots is as simple as clipping on the trays and slotting them in. I also like that they've included keys to lock hard drives into the slots.
Advanced software functions. Synology's software is award winning - and I can see why. It is very intuitive. My Disk Station regularly checks itself for disk and data errors without me having to do anything. You can also choose to install additional apps and run services such as web and email hosting yourself.
It is a multi-bay NAS with 4 hard drive slots. This makes it flexible in how much storage I want to buy and use. It is also scalable up to 9 drives if I ever decide to expand it. It is also super easy to install hard drives - you just clip on the black trays and slide it into the slots.
Read more about the Synology DS918+ here.
HOW I SETUP MY RAID:
Admittedly, this was the most confusing part about the whole process. You basically need to decide how much redundancy and protection you want vs how much storage space you need from your hard drives. I made the compromise of turning 40TB into a usable 30TB RAID configuration:
3x Seagate IronWolf 10tb hard drives (30tb total) as Synology Hybrid RAID 1
All my important / archival files go here. This setup gives me 1 hard drive worth of failure protection. That is; if 1 of my 3 hard drives fails, the other two can rebuild and restore that failed hard drives content. In practicality, 30TB in this RAID configuration leaves me with 20TB worth of usable storage.
*Read more about Synology Hybrid RAID and it's benefits over regular RAID configurations here.
1x Seagate IronWolf 10tb hard drive as a free / transfer hard drive.
I've decided to keep one drive free and separate from my RAID setup. This means that I can squeeze more usable storage capacity from my NAS setup. The files on this drive however, are not redundancy protected so anything I store on this drive will be temporary and non-essential.
MY NEW WORKFLOW
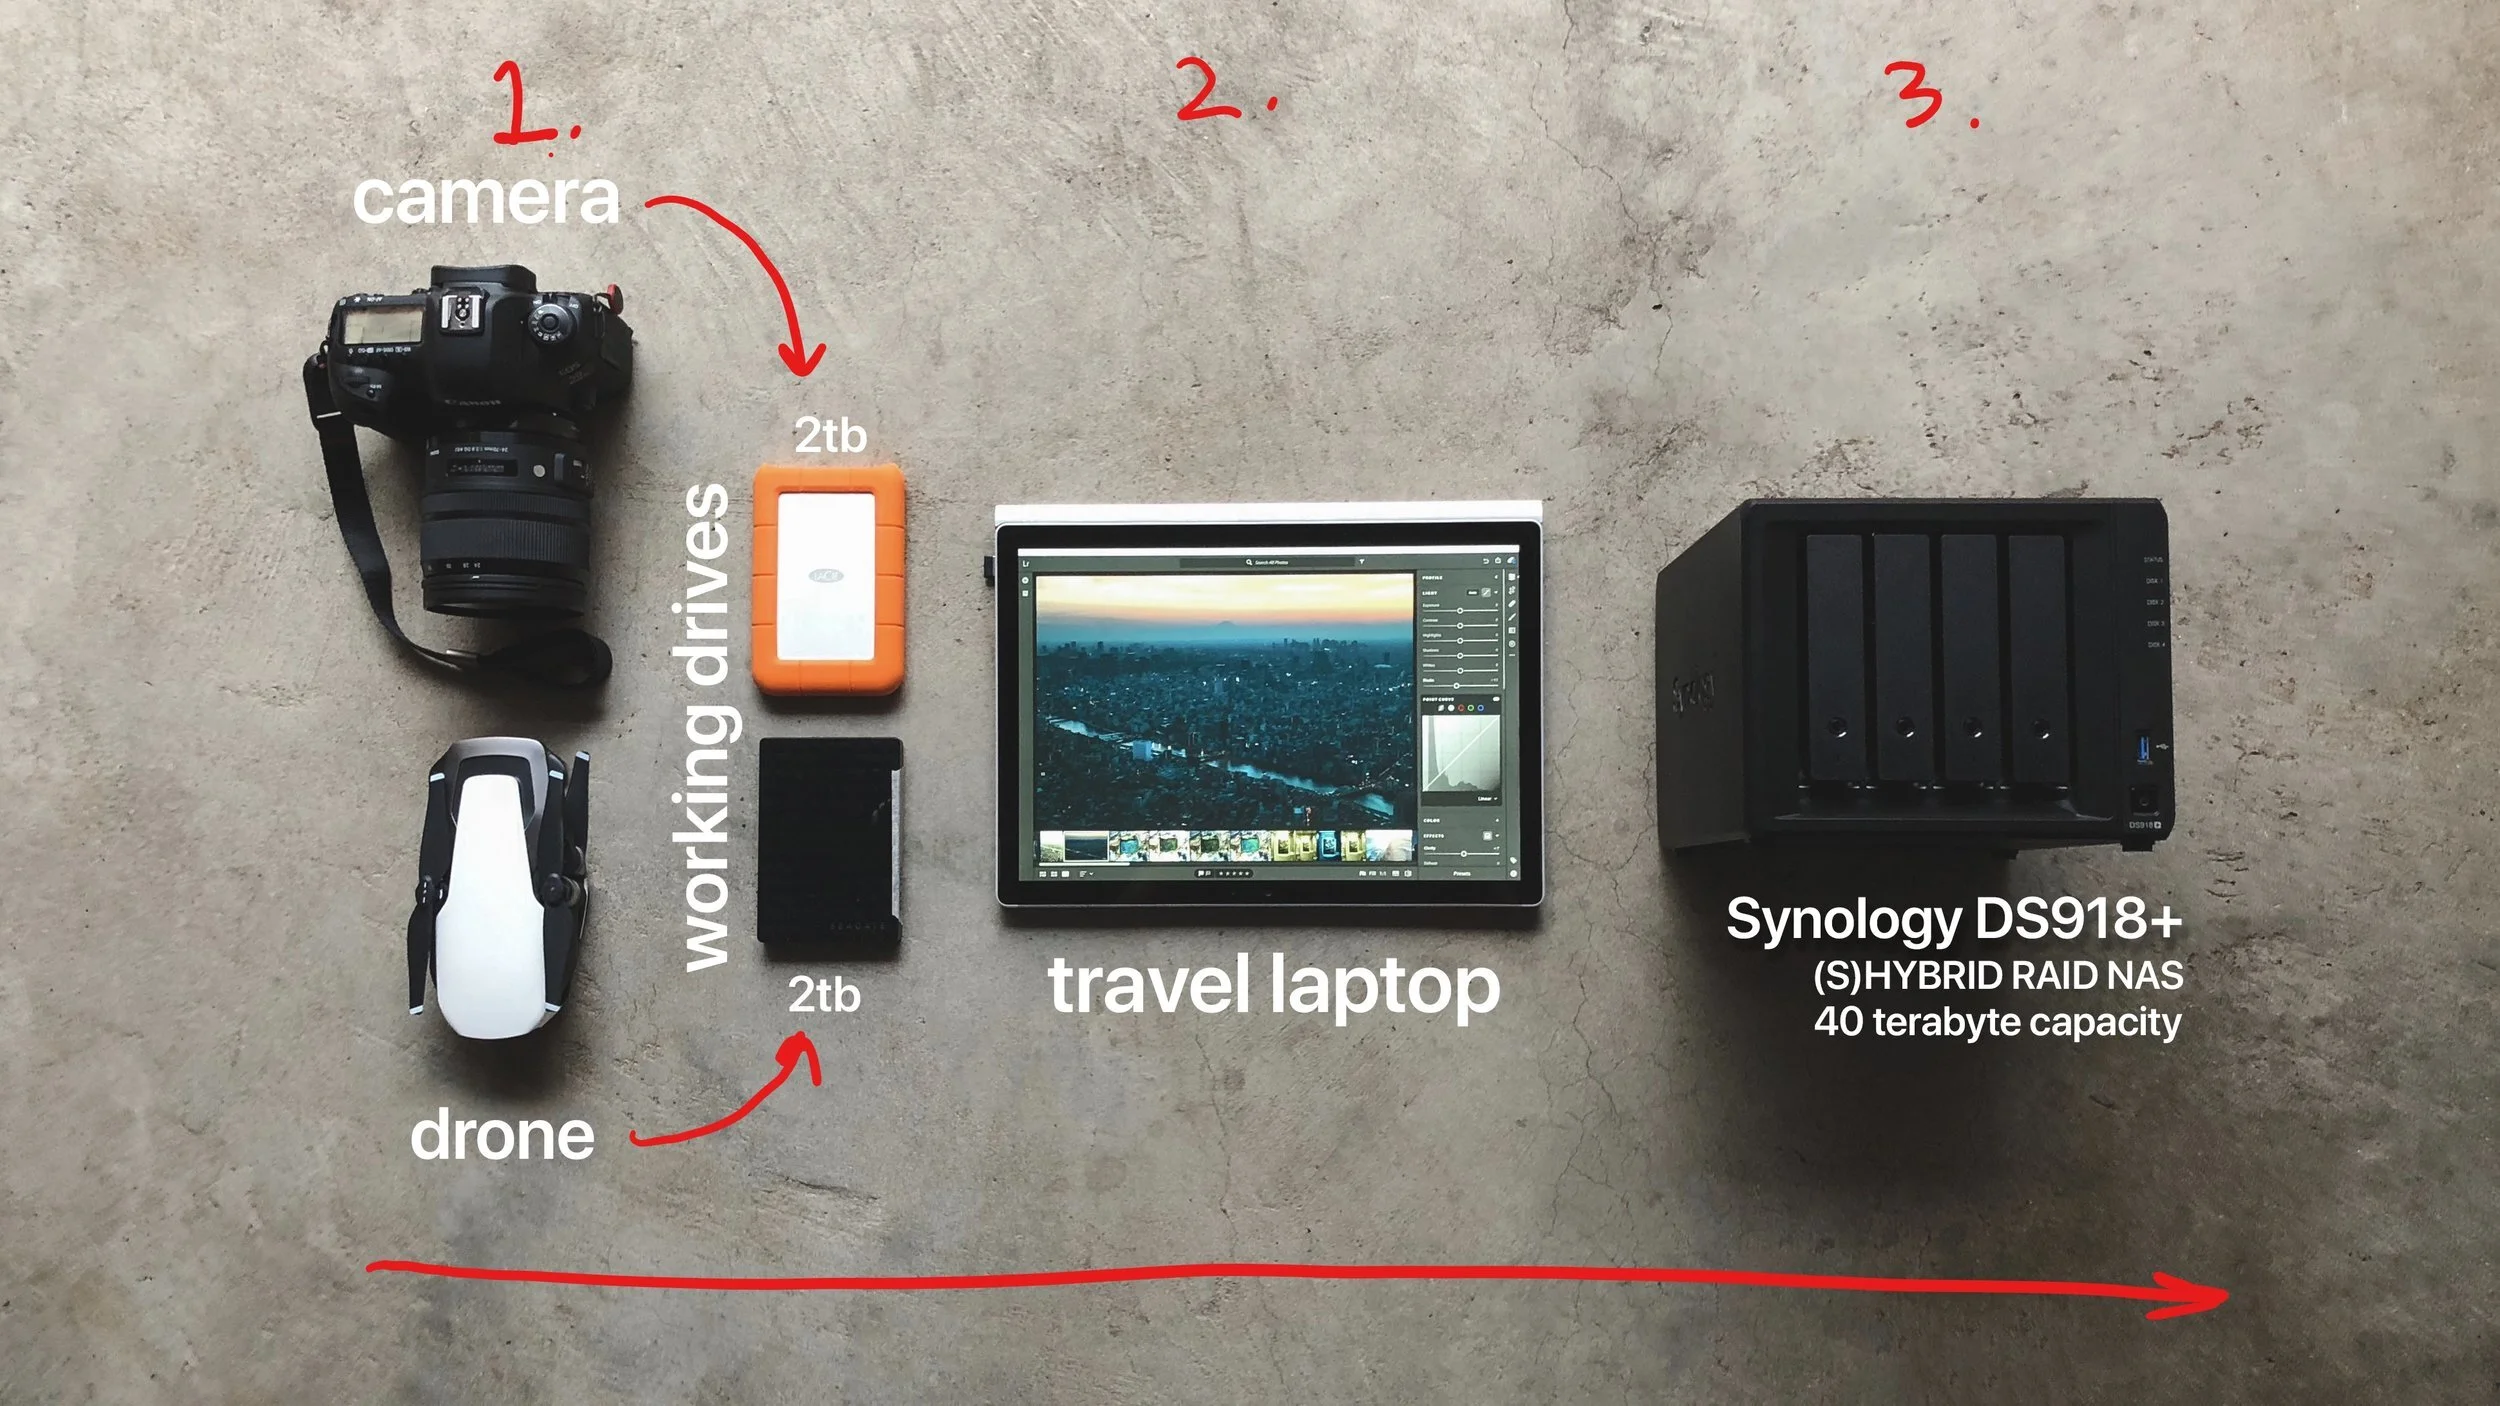
This is my new setup. It looks pretty simple right? (It is). It's my new complete workflow and what you see above is all I need end-to-end.
Over the past few months of testing and refining this workflow. I've managed to strip away all the unnecessary components and crush it down to just these essentials. I've field tested it on a number of commercial campaigns and International travel projects and it works great. I believe it is suitable for hobbyists and professionals alike.
Let me walk you through my workflow step-by-step:
1. SHOOT + OFFLOAD ONTO WORKING DRIVE
At the end of each shooting day (regardless of how much or little photos and footage I have shot) I will offload all my content onto two working drives (2x 2TB external hard drives). I am purposely ritualistic about this - to ensure I never misplace or forget to offload footage. These two hard drives mirror each other and are stored in separate bags / locations to minimize risk of loss or theft.
If I have time and am at home, I will also offload the files to my Synology Disk Station.
2. EDIT PHOTOS & VIDEOS VIA WORKING DRIVES
I use my laptop (Microsoft Surface Book 2) to offload, sort and edit my photos and videos from my working drives. I keep most of what I edit off my laptop and on the working drives to save space (it is a pain when my laptop hard drive files up).The USB 3.0 drives I use are fast enough for most editing scenarios.
I prefer using the LaCie rugged drives (2TB) as my working drives as I travel a lot. It is the bright orange hard drive (pictured above) which makes it super easy to spot (lessens the chance of me leaving it behind at a cafe or hotel). They are also water, drop and shock resistant and have been able to survive my travels.
*Tip: buy an SSD hard drive as you're primary working drive if you can afford it (they're expensive but super fast!).
3. BACKUP AND ARCHIVE CONTENT ONCE PROJECT IS DONE.
As soon as I am done with a project I will offload it from my working drives and archive it on my Synology + Seagate NAS station. It's huge storage capacity (usable 30TB) can easily handle all my files throughout the year. Once it is on my Synology Disk Station, I know that my files are safe and protected. It also means that I can access them from anywhere in the world that has an internet connection!
*4. BONUS: BACKUP UP IMPORTANT FILES TO THE CLOUD.
Although RAID setups do add a level of redundancy in case your hard drives physically fail, It is important to note that they are not a backup solution. If something were to happen to your NAS station, a house fire for example, you would lose all your files just the same. That is why I upload my most important files to the a cloud service as a final safety measure. This serves as a location-separated backup. I would upload all my files if Australian Internet speeds weren't so slow.
LEARN FROM MY LOSS
Your files & precious memories are irreplaceable! Just like how you'd run and grab your photo albums in a hypothetical house fire, you should treat your digital files with the same level of care. Whether you adopt my exact workflow or not, you should definitely consider creating a foolproof solution of your own.
From my experience, I'd recommend to keep your workflow as simple as possible to ensure that you stick to it. You only have to figure out your workflow once if you do it right.
I'd like to extend a huge thanks to Synology and Seagate for their advice in how to best setup my new workflow and for sending me their awesome products. Please check their products out as they have been my brands of choice.
Let me know what kind of workflow solution you put together!
Please feel free to reach out if you have any questions.
FOLLOW ME ON INSTAGRAM @ITCHBAN
TL;DR
Data loss happens to the best of us.
Hard drives fail. This is a fact. It is not a question of if, but when.
Consider adding a RAID / NAS station setup to your storage workflow. They provide a level of protection against hard disk failure, are a great file management solution and enable you to access all your files remotely.
Create a simple, ritualistic workflow.
Road test your workflow and make adjustments as needed.
Synology DS918+ Disk Station with Seagate IronWolf 10TB (NAS ready) hard drives is my setup of choice.


